
Vite vue + Github Pages 페이지 구축
기존 vue-cli 를 사용한 vue 프로젝트로 github pages 를 구축했는데, 대세에 따라 vite 로 변경하기로 했다. 말이 변경이지 새로 만들었다.
기존 vue-cli 로 했던 것에서 vite 로 변경하며 필요한 부분만 작성하였고, github actions 등의 기능은 Github.io + Vue3 로 블로그 만들기 를 참고하면 된다.
vite 프로젝트 생성
npm create vite@latest
우선 빈 vite 프로젝트를 만들어준다. 우리는 vue3 와 typescript 를 활용해서 개발할 것이다.
vite-ssg
vite 로 static site generating 하는 라이브러리이다. 우리가 만드는 포스트 마다 정적 사이트로 만들어준다
npm i -D vite-ssg vue-router @vueuse/head
위 커맨드로 vue-router 와 @vueuse/head 도 함께 설치해주라고 나와 있는데, 나는 @unhead/vue 를 사용했다.
// package.json
"scripts": {
  "build:ssg": "vite-ssg build"
}
빌드 커맨드를 대체 혹은 추가해준다.
// main.ts
export const createApp = ViteSSG(
    // 루트 컴포넌트
    App,
    { routes },
    ({ app, router, routes, isClient, initialState }) => {
        // 플러그인 세팅
    },
)
createApp 을 ViteSSG 로 변경한다. 이러면 빌드했을 때, SPA 앱이 아니라, MPA로 빌드가 된다. 각 라우트마다 html 페이지가 따로 생성된다.
vite-plugin-pages-sitemap
vite-plugin-pages-sitemap
https://github.com/jbaubree/vite-plugin-pages-sitemap
사이트맵 자동 생성기이다. vite-ssg 와 vite-plugin-pages 를 같이 지원한다.
npm install -D vite-plugin-pages-sitemap
import Pages from 'vite-plugin-pages'
import generateSitemap from 'vite-plugin-pages-sitemap'
export default {
  plugins: [
    // ...
    Pages({
      onRoutesGenerated: routes => (generateSitemap({ routes })),
    }),
  ],
}
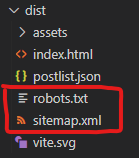
npm run build 를 하면 바로 사이트맵과 로보츠 파일이 만들어진다. 기본 사용법대로 사이트맵 파일을 만들면 주소가 localhost 로 되는데, hostname 을 변경해서 내 사이트 주소를 설정해주어야 한다.
vite-plugin-pages
vite-plugin-pages
https://www.npmjs.com/package/vite-plugin-pages
파일 시스템 기반의 라우트를 생성한다.
npm install -D vite-plugin-pages
이녀석도 vue-router 가 필요한데, 위에서 설치했기 때문에 생략한다.
// vite.config.ts
import Pages from 'vite-plugin-pages';
export default defineConfig({
  plugins: [
    Pages({
      extensions: ['vue', 'md'],
      pagesDir: 'src/pages',
      /**
       * 생성된 라우트에 추가 로직을 작성한다.
       * @param route 생성된 라우트
       * @returns
       */
      extendRoute(route) {
        console.log('route', route);
        return route;
      }
    }),
  ],
})
Pages 플러그인을 설정파일에 추가하자. md 파일이 있는 경로와, 확장자를 추가해주면 된다.
파일 추가하기
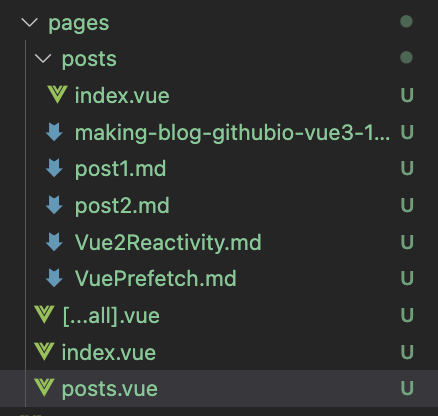
Pages 플러그인에 등록해둔 경로에 .vue 혹은 .md 파일을 만들면 자동으로 라우트로 인식한다. 기본적으로 만들어야 할 파일이 두가지 있다.
- […all].vue → 접속한 페이지에 해당하는 라우트가 없을 때 띄워줄 404 페이지
- index.vue → 루트 페이지
나머지는 파일을 만드는대로 라우트에 등록된다.
nested routes
Nested Routes
https://github.com/hannoeru/vite-plugin-pages#nested-routes
메인 페이지와 포스트 페이지의 디자인을 완전히 분리하고 nested routes 로 관리할 것이다.
route {
  path: '/posts',
  component: '/src/pages/posts.vue',
  customBlock: undefined,
  children: [
    {
      name: 'posts-post2',
      path: 'post2',
      component: '/src/pages/posts/post2.md',
      customBlock: undefined,
      props: true
    },
    // ....
  ],
  props: true
}
/pages 폴더 아레, posts 로 폴더와 vue 파일을 하나씩 만든다. 그럼 자동으로 nested routes 로 인식한다.
<script setup></script>
<template>
  <div class="post-index-wrapper">
    <router-view></router-view>
  </div>
</template>

<style>
</style>
posts.vue 파일에는 router-view 를 사용하면 끝!
vite-plugin-vue-layouts
vite-plugin-vue-layouts
https://www.npmjs.com/package/vite-plugin-vue-layouts
vite-plugin-pages 와 세트이다. main 에서 createApp 을 할 때, 라우트를 인식시키기 위함이다. 무조건 필요한지는 잘 모르겠다. 더 알아봐야 함.
npm install -D vite-plugin-vue-layouts
// vite.config.ts
import Layouts from 'vite-plugin-vue-layouts';
export default defineConfig({
  plugins: [
    Layouts(),
  ]
})
vite 설정에 Layouts 추가하기
// tsconfig.json
"compileOptions": {
    "types": [
      "vite/client",
      "vite-plugin-pages/client",
      "vite-plugin-vue-layouts/client",
      "node"
    ],
}
virtual import 를 인식하기 위해서 types 항목을 추가한다.
// main.ts
// virtual:generated-layouts
//   tsconfig.json-compilerOptions-types
//   "vite-plugin-vue-layouts/client"
import { setupLayouts } from 'virtual:generated-layouts'
// virtual:generated-pages
//   tsconfig.json-compilerOptions-types
//   "vite-plugin-pages/client"
import generatedRoutes from 'virtual:generated-pages'

const routes = setupLayouts(generatedRoutes)
export const createApp = ViteSSG(
    // 루트 컴포넌트
    App,
    { routes },
    ({ app, router, routes, isClient, initialState }) => {
        // 플러그인 세팅
    },
)
pages 플러그인이 셍성한 라우트를 main 에서 적용시킨다.
vite-plugin-md
vite-plugin-md
https://github.com/antfu/vite-plugin-md
마크다운을 뷰 컴포넌트로 만들어준다.
npm i vite-plugin-md -D
import Markdown from 'vite-plugin-md'

export default defineConfig({
  plugins: [
    vue({
      include: [/\.vue$/, /\.md$/], // 마크다운 파일도 인식하기
    }),
    Markdown(),
  ],
})
기본적으로 있던 vue 플러그인에 md 파일도 인식할 수 있게 항목을 추가해주고, Markdown 플로그인을 추가한다.
메타태그 추가
GitHub - mdit-vue/vite-plugin-vue-markdown: Compile Markdown to Vue component
페이지별로 메타태그를 추가하고싶은데, .md 파일로는 어떻게 해줘야 할까? vite-ssg 와 vite-plugin-md 에서 이미 vueuse/head 를 사용한다. 그래서 unhead/vue 를 사용해보려고 했지만, 충돌 문제가 있어서 vueuse/head 의 방식을 따르기로 했다.
---
meta:
  - name: My Cool App
    description: cool things happen to people who use cool apps
---
md 파일의 최상단에 --- 로 구분선을 위아래로 넣어주고, 안에 내용을 넣어준다.
---
meta:
  - name: description
    content: Github.io 와 Vue3 를 활용해서 블로그를 시작. SPA를 prerendering 하여 개별 페이지를 생성하고, 메타태그를 추가. 구글 검색 엔진에 등록할 사이트맵 자동 생성. 마크다운을 html 로 변환. Google Analytics 도입으로 방문자 수 체크.
---
이런 형식도 된다.
<title>Github.io + Vue3 로 블로그 만들기</title>
<meta name="description"
content="Github.io 와 Vue3 를 활용해서 블로그를 시작. SPA를 prerendering 하여 개별 페이지를 생성하고, 메타태그를 추가. 구글 검색 엔진에 등록할 사이트맵 자동 생성. 마크다운을 html 로 변환. Google Analytics 도입으로 방문자 수 체크.">
<meta property="og:title" content="Github.io + Vue3 로 블로그 만들기">
html 파일에 자동으로 meta 태그가 추가된다.
markdown-it 플러그인
markdown-it-anchor
markdown-it-anchor
https://www.npmjs.com/package/markdown-it-anchor
H 태그에 기본적으로 anchor 를 달아서 이동할 수 있게 한다. 한글도 지원한다.
markdown-it-table-of-contents
markdown-it-table-of-contents
https://www.npmjs.com/package/markdown-it-table-of-contents
[[toc]] 를 사용하면 목차를 만들 수 있다.
목차 요소를 따로 떼서 다른 곳에 붙이기
목차가 md 페이지 컴포넌트의 상단에 고정되어 있어서 원하는 곳에서 사용할 수 없다. 예를 들어, 오른쪽 부분에 고정을 시킨다던지.
onMounted(() => {
  // 목차를 markdown-body 내부에서 제거한 후,
  // 옆에 붙인다.
  const mdBody = document.querySelector(".markdown-body");
  const targetToc = document.querySelector(".new-table-of-contents");
  const toc = document.querySelector(".markdown-body .table-of-contents");
  const main = document.querySelector("main");

  if(mdBody && targetToc && toc && main) {
    targetToc.innerHTML = toc?.innerHTML!;
    // 라우트 변경 시 `.table-of-contents` 의 innerHTML 이 한번 제거되고 undefined 로 뜨기 때문에
    // display: none 만 붙여서 숨긴다.
    (toc as HTMLElement)?.style.setProperty("display", "none");
  }
})
자바스크립트로 간단하게 innerHTML 을 붙이려는 요소에 넣어주고, 해당 요소는 제거하면 된댜.
[!attention] 원래는
toc를 remove 로 제거했으나, 그러면 라우트를 두번 이상 이동할 때, 이미 제거된.table-of-contents에서 내용을 찾아undefined를 얻게 된다. 라우트 시 toc 요소가 없으면 생성하지 못하는듯 하다. 그래서display: none;속성만 주어서 보이지만 않게 한다.
watch(() => route.fullPath, () => {
	// SPA 라우트가 바뀔 때마다 toc 변경
	nextTick(() => {
		createToc();
	});
});
라우트가 변경될 때마다 TOC를 옮겨주기 위해서 watch 를 추가한다.
markdown-it-prism
markdown-it-prism
https://www.npmjs.com/package/markdown-it-prism
prism 라이브러를 래핑했다. 마크다운 파일 내의 소스코드를 위한 pre 태그를 하이라이팅한다.
export default defineConfig({
  plugins: [
    Markdown({
      markdownItSetup(md) {
        // prism 코드 하이라이터
        md.use(MDPrism)
      },
    }),
  ],
})
markdownItSetup 함수에서 use 로 사용선언하면 자동으로 마크다운 코드 영역은 하이라이팅 된다. 클래스가 부여되기만 해서 css 는 직접 넣어주어야 한다.
<style>
@import "../assets/scss/prism-vscode.scss";
</style>
우리의 경우 포스트가 RouterView 에서 자동으로 페이지화되어 보여지기 때문에, scoped style 로는 스타일을 적용할 수 없다. 그래서 전역 css 로 선언해주어야 한다.
테마
GitHub - PrismJS/prism-themes: A wider selection of Prism themes 여러가지 테마를 모아둔 깃헙이다. 가장 익숙한 vscode 를 사용했다.
pinia
pinia
https://pinia.vuejs.org/getting-started.html#installation
vite-ssg pinia
https://github.com/antfu/vite-ssg#initial-state
포스트 목록을 관리하기 위해서 pinia 를 설치하자.
npm install pinia
// main.ts
export const createApp = ViteSSG(
  App,
  { routes },
  ({ app, router, initialState }) => {
    const pinia = createPinia()
    app.use(pinia)

    if (import.meta.env.SSR)
      initialState.pinia = pinia.state.value
    else
      pinia.state.value = initialState.pinia || {}

    router.beforeEach((to, from, next) => {
      const store = useRootStore(pinia)
      if (!store.ready)
        // perform the (user-implemented) store action to fill the store's state
        store.initialize()
      next()
    })
  },
)
vite-ssg 깃헙에서 나온 설명서인데, 글로벌로 store 를 등록하는 게 아니라면, app.use 까지만 해주어도 된다.
// src/store/posts.ts
import axios from 'axios';
import { defineStore } from 'pinia'
import { ref } from 'vue';

export interface Post {
  url: string;
  fileName: string;
  title: string;
  description: string;
  tags: string[];
  data: string;
}

export const usePosts = defineStore('post', () => {
  const postList = ref<Post[]>([]);
  const currentUrl = ref<string>('');

  async function fetchPostList(
) {
    axios.get<Post[]>(`/postlist.json`).then(res => {
      postList.value = res.data;
      return res.data;
    });
  }

  return {
    postList,
    currentUrl,
    fetchPostList,
  }
})
post 목록을 가져오는 store 를 하나 만든다. 포스트를 단순히 json 파일로 저장해두고, 사용할 것이다.
// public/postlist.json
[
  {
      "url": "Vue-Prefetch",
      "fileName": "Vue-Prefetch",
      "title": "Vue Code Spliting 간단히 알아보기 (+ Prefetch)",
      "description": "Vue 프로젝트의 Code Spliting 이 어떻게 작동하는지와 webpack prefetch 옵션 에 대해서 간략한 설명.",
      "createdAt": "2022-08-05",
      "updatedAt": "2022-08-05",
      "tags": ["Vue", "Vue2", "Vue3", "Code Spliting", "코드분산", "Prefecth", "Webpack"]
  },
  // ...
]
public 폴더에 파일을 두면, 그 항목은 사이트의 루트에 포함되게 된다. 같은 호스트이기 때문에 cors 없이 axios 로 동적으로 조회할 수 있다.
문제
vite-ssg + gsap
[vite-ssg] An internal error occurred.
[vite-ssg] Please report an issue, if none already exists: https://github.com/antfu/vite-ssg/issues
file:///Users/hslee/Workspaces/something/lhs-source.github.io/.vite-ssg-temp/main.mjs:6
import { ScrollTrigger } from "gsap/ScrollTrigger.js";
         ^^^^^^^^^^^^^
SyntaxError: Named export 'ScrollTrigger' not found. The requested module 'gsap/ScrollTrigger.js' is a CommonJS module, which may not support all module.exports as named exports.
CommonJS modules can always be imported via the default export, for example using:

import pkg from 'gsap/ScrollTrigger.js';
const { ScrollTrigger } = pkg;

    at ModuleJob._instantiate (node:internal/modules/esm/module_job:123:21)
    at async ModuleJob.run (node:internal/modules/esm/module_job:189:5)
    at async Promise.all (index 0)
    at async ESMLoader.import (node:internal/modules/esm/loader:530:24)
    at async build (file:///Users/hslee/Workspaces/something/lhs-source.github.io/node_modules/vite-ssg/dist/shared/vite-ssg.62550b28.mjs:996:87)
    at async Object.handler (file:///Users/hslee/Workspaces/something/lhs-source.github.io/node_modules/vite-ssg/dist/node/cli.mjs:29:5)

Node.js v18.12.1
javascript - GSAP ScrollTrigger with Next.js - Stack Overflow
import MPP from 'gsap/dist/MotionPathPlugin';
import ScrollTrigger from 'gsap/dist/ScrollTrigger';

const { MotionPathPlugin } = MPP;
gsap.registerPlugin(ScrollTrigger);
gsap.registerPlugin(MotionPathPlugin);
이런식으로 바꿔주었다. vite-ssg 로 사용할 때는 다른 빌드 방식을 사용하나보다. esbuild 라거나, commonJS 라거나… 그래서 /dist 폴더 안의 라이브러리를 사용해주었다.
axios
vite-ssg 는 정적 html 사이트를 생성하기 때문에 setup 안에 있는 함수를 무조건 실행한다. 그래서 최초에 데이터를 가져오는 axios 함수가 실행되면서 없는 서버로 데이터를 가져오려고 해서 에러가 발생한다.
file:///Users/hslee/Workspaces/something/lhs-source.github.io/node_modules/axios/lib/core/AxiosError.js:89
  AxiosError.call(axiosError, error.message, code, config, request, response);
             ^
AxiosError: connect ECONNREFUSED ::1:80
    at AxiosError.from (file:///Users/hslee/Workspaces/something/lhs-source.github.io/node_modules/axios/lib/core/AxiosError.js:89:14)
    at RedirectableRequest.handleRequestError (file:///Users/hslee/Workspaces/something/lhs-source.github.io/node_modules/axios/lib/adapters/http.js:591:25)
    at RedirectableRequest.emit (node:events:513:28)
    at eventHandlers.<computed> (/Users/hslee/Workspaces/something/lhs-source.github.io/node_modules/follow-redirects/index.js:14:24)
    at ClientRequest.emit (node:events:513:28)
    at Socket.socketErrorListener (node:_http_client:494:9)
    at Socket.emit (node:events:513:28)
    at emitErrorNT (node:internal/streams/destroy:151:8)
    at emitErrorCloseNT (node:internal/streams/destroy:116:3)
    at process.processTicksAndRejections (node:internal/process/task_queues:82:21) {
::1:80 경로로 데이터를 가져오면서 에러가 발생한 것이다.
const posts = usePosts();

onMounted(() => {
  animPostList();
  posts.fetchPostList();
})
onMounted 내부에서 fetch 를 실행하면, setup 훅과 다르게 빌드 시 실행하지 않는다.